
On 2nd March 2015, the new FLIR C2 thermal imaging camera was launched, priced at only £559 + VAT. We got our hands on a pre-launch model to review and show how it can benefit you. All thermal images shown in this review were captured with a FLIR C2.
First impressions
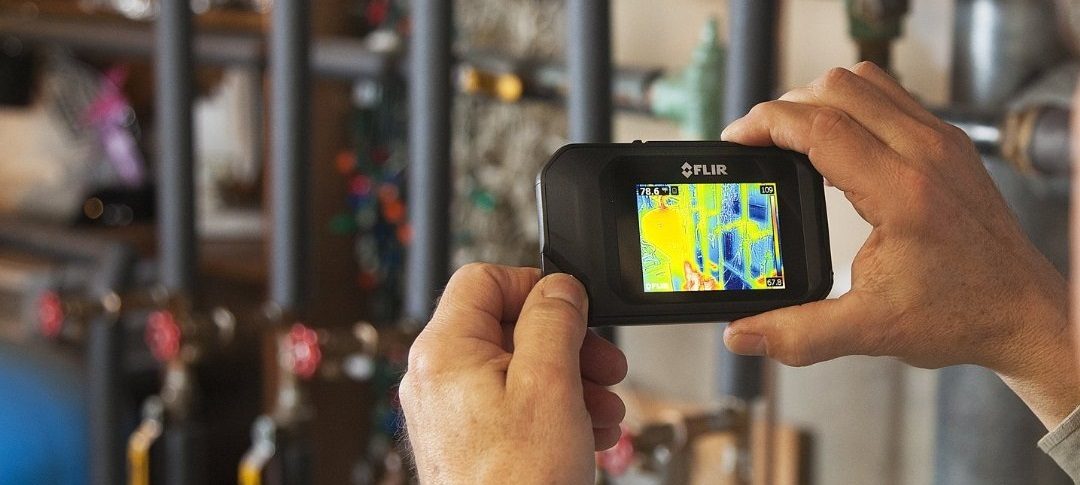
The first thing you’ll notice about the FLIR C2 is the compact size. It’s comparable to a small smartphone & the camera’s sleek design certainly makes it look the part. The camera will easily fit into your pocket and is also supplied with a neck strap.
It features a 3″ LCD touchscreen, built-in li-ion battery and a separate memory card for storage of around 500 images. A universal mains charger is supplied as standard, with plugs for use in various countries.
The key point about the FLIR C2 is that it’s a genuine thermal imaging camera. This means you get a temperature measurement for each pixel on the image captured. As such, the images can be downloaded into the FLIR Tools reporting software for editing and analysis. This post capture measurement capability is not possible with lower cost imaging devices such as the FLIR ONE, FLIR TG165 or the Fluke VT04A. The FLIR Tools software package is a free download, available for PC or MAC.
 |
 |
Thermal imaging capability
As we’ve mentioned, this is a genuine thermal imaging camera. It uses the latest FLIR Lepton Core with an 80 x 60 pixel thermal resolution and 100mK thermal sensitivity (0.1°). It’s a fixed focus camera, therefore is more suited to close up working around 2m – 3m from the target.
The temperature measurement range is from -10°C to +150°C, making it ideal for most general electrical, building, heating & plumbing applications. It also has a wide 41° field of view making it easier to capture images in enclosed spaces.
A built-in visual camera adds MSX enhancement capability. This feature takes the outline detail from the visual camera and overlays it onto the thermal image. With MSX your thermal images become easier to analyse and will look much better when presented in a report.
The camera offers three different colour palettes, Ironbow, Rainbow and Grayscale, as well as the capability to adjust emissivity and reflected temperature settings. When an image is captured, it will automatically store the thermal and visual images, which can be viewed individually in the software. It’s also worth noting that all image modes are available once downloaded. These include full thermal, thermal MSX, picture-in-picture & thermal blending.
 |
 |
Key applications
The FLIR C2 is ideal for identifying many problems that are invisible to the naked eye. As an electrician, you may want to locate loose connections, overloaded cables or
open circuits. A quick scan with the FLIR C2 will highlight these issues, enabling you to fix them before they become dangerous faults. With thermal imaging being included in
Guidance Note 3, the FLIR C2 makes the provision of this service affordable for everyone.
 |
 |
Another application is building faults. Problems such as moisture ingress, missing or damaged insulation, thermal bridges and air leaks can be located with the FLIR C2.
Other uses include checking radiators or locating blockages in pipes.
There are many applications that the FLIR C2 will suit and its compact size means it can easily be carried around and used anywhere.
How does it compare to the more expensive cameras?
Compared to the lower end cameras with the same resolution, the image produced by the FLIR C2 is as good as the handheld FLIR E4 and Fluke Ti90. The design of the C2 does have some limitations, such as a built-in battery which will give you around 2 hours continuous life. In addition, the Fluke & FLIR handheld models are drop tested to 2m, if you were to drop the FLIR C2 from 2m, chances are it will be damaged. Also, the more expensive handheld cameras have better focussing capability, enhanced controls, increased resolution, better sensitivity and interchangeable lenses, which produce a higher quality image.
This being said, there is a camera to suit every application and budget. The FLIR C2 has its place among the range and you may find that in the future your application or client requirements change, which will warrant an upgrade to a better model. It is without doubt a great entry level product for anyone who hasn’t got the budget for the more expensive models.
Ease of use
The simple menu and camera functions are very intuitive. It won’t take you long to get to grips with it. A large image capture button is located along the side, making it easy to use in landscape or portrait mode.A nice feature of the FLIR C2 is auto-orientation. Move the camera from landscape to portrait and the image will rotate accordingly.

As with any thermal imaging camera, having an understanding as to how the technology works is the key to ensuring you don’t misinterpret the image. There are a number of
one day training courses available, but you can also get some basic training directly from FLIR online.
Closing comments
The FLIR C2 is a real leap forward for thermal imaging, making it more affordable and opening this technology up to a wider market. While we wouldn’t recommend
using it for critical surveys or medical applications, it is ideal for quick scanning to locate possible problems.

If you currently have thermography surveys carried out by an external company, the FLIR C2 could be used by your engineers for interim checks. While it won’t replace the service & expertise of a qualified thermographer, it will help in maintaining systems between surveys. The camera is also backed by a two year manufacturers’ warranty and an additional 10 year warranty on the detector. If you have thought about using a thermal camera and been put off by the cost, this is a great place to start. Make sure you get yours first and order online with Instrotech today for only £559 + VAT or call us on 01923 442244.